13Disciple | 10-Jan-20
Thanks to Yankee for helping me capture the videos and screenshots in this article.
This guide requires understanding Fundamental Game Mechanics -> Vision Mechanics
This guide requires understanding Fundamental Game Mechanics -> Vision Mechanics
Setting up in Game Settings
Before we get into the details it helps to set up the correct in game settings to allow you to see easier in sniper view. Go into settings -> Graphics -> Details and then uncheck the settings for "grass in sniper mode" and "foliage transparency."
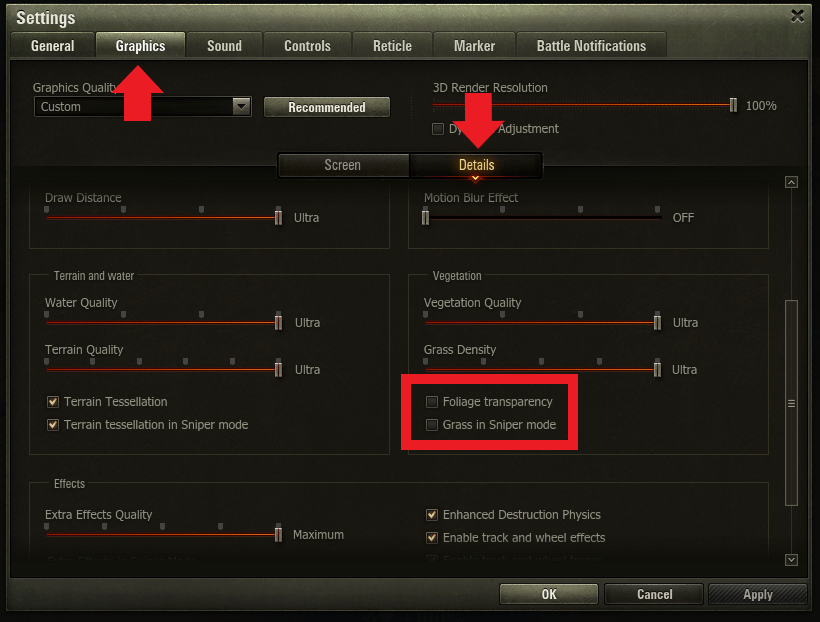
Removing grass in sniper mode can help you see clearly when brawling over a ridge. You don’t want to have to guess where the ridge ends and your targets profile begins.
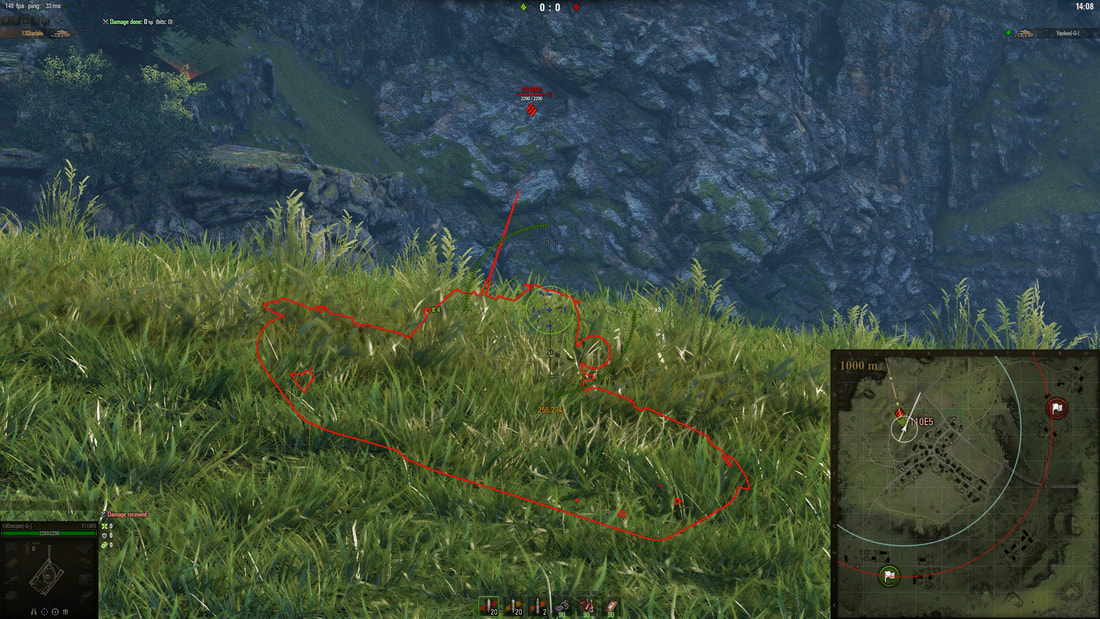
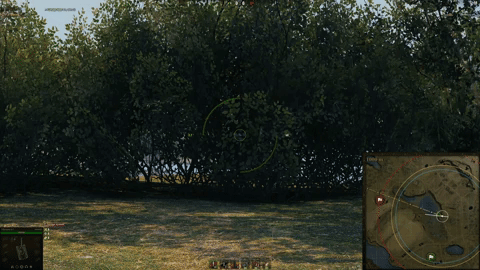
With Grass in Sniper Mode
|
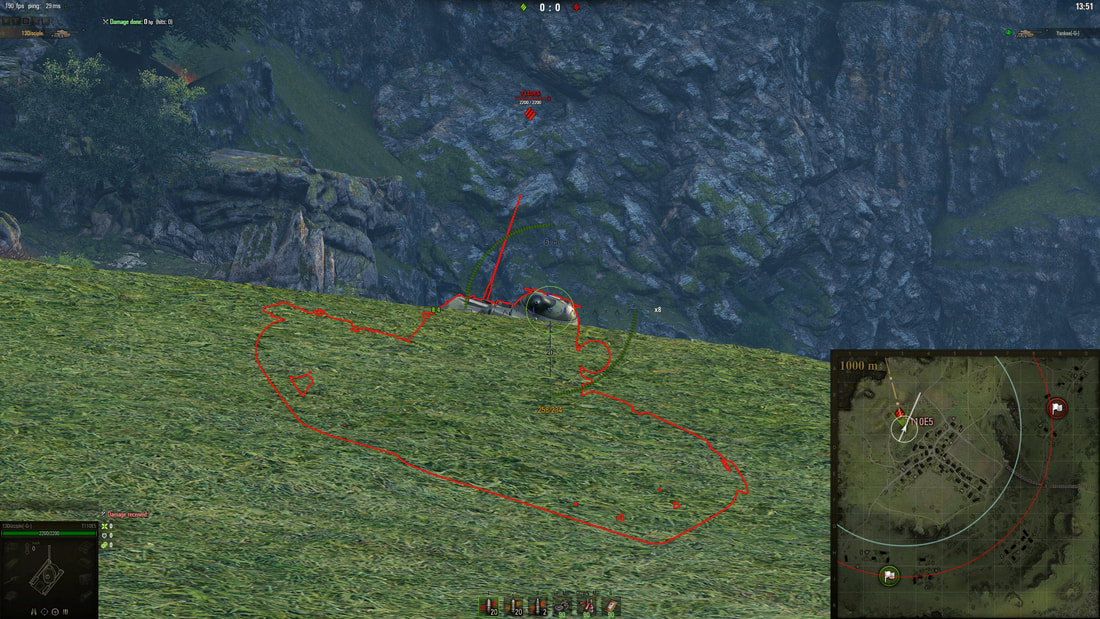
With Out Grass in Sniper Mode
|
Turning off foliage transparency changes the trees, bushes, and various other flora that provide a camo bonuses to your tank, to be opaque in sniper mode when they are more than 15m from your tank. Then they will turn completely transparent when you are closer than 15m in sniper mode. This way you will never have to wonder if that partially translucent bush is going to give you cover or not.
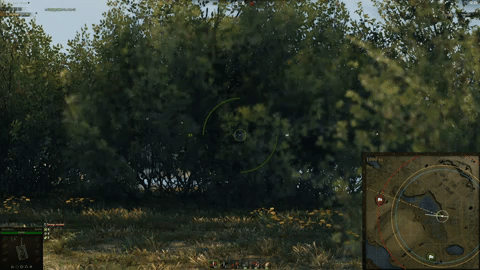
With Foliage Transparency
|
With Out Foliage Transparency
|
Using Flora Without Breaking Concealment
Step one is to roll into a bush so that it becomes transparent in sniper mode, but covers all the spotting check points on your vehicle. This will enable your vehicle spot enemies through the bush while still maintaining the bushes camo around your tank. You want to place your vehicle as far back as you possibly can while still maintaining a bush that disappears in sniper mode. This way it takes very little movement to make it opaque which is the next part.
Once you have spotted an enemy for yourself and lined up your shot, you then reverse your tank until the bush in front of you (and around you) becomes opaque. It turns opaque when it is greater than 15 meters from your tank. Opaque bushes maintain their camo bonus for your tank even after firing.
After firing while your tank is on reload you can wait for the second shell if your target is still lit. Otherwise you’ll have to nudge forward to make the bush transparent again for spotting. Once you have spotted your target again, you roll back until the bush is opaque and fire again.
Example - If a bush is providing you 35% camo, and your tank is at 10% while moving and 3% while firing. that means your tank will have 45% concealment while its moving in the bush, and it will still have 38% concealment after firing from behind the bush and beyond 15m. If you are firing out of a bush and you are closer than 15 meters, then you will lose the concealment bonus and your camo will drop to 3%.
Not Spotting for Yourself
There will be times when you have an ally that is doing the spotting for you. In this instance the play is exactly the same, but you won’t need to move your tank forward to spot for yourself. The only reason to make the bush transparent is to line up a shot. Otherwise you can stay put and allow the bush to stay over 15m away from you. Keep in mind that you’ll be sharing all exp you earn for that damage with your spotting ally. This is usually worth it as your spotter doesn’t have to fire, and you don’t have to risk getting spotted by moving.
Trading Efficiently
We can easily tie this back to our overall goal of trading efficiently in vehicle to vehicle engagements. This is a method that players use to create un-returnable damage. Any damage you can do without taking any is the best trade possible, and will improve your overall damage. This is also why on some maps, the spotting tank is a force multiplier! It only takes one spotting tank to enable a large number of hidden snipers to push damage on that spotted target. The spotting tank can stay concealed in their bush by not having to fire, and your snipers can all maintain their concealment, or shoot from outside spotting range.
Also remember that just because you aren’t spotted - doesn’t prevent the enemy from blind firing at you. We cover blind fire in the next article.
Also remember that just because you aren’t spotted - doesn’t prevent the enemy from blind firing at you. We cover blind fire in the next article.


