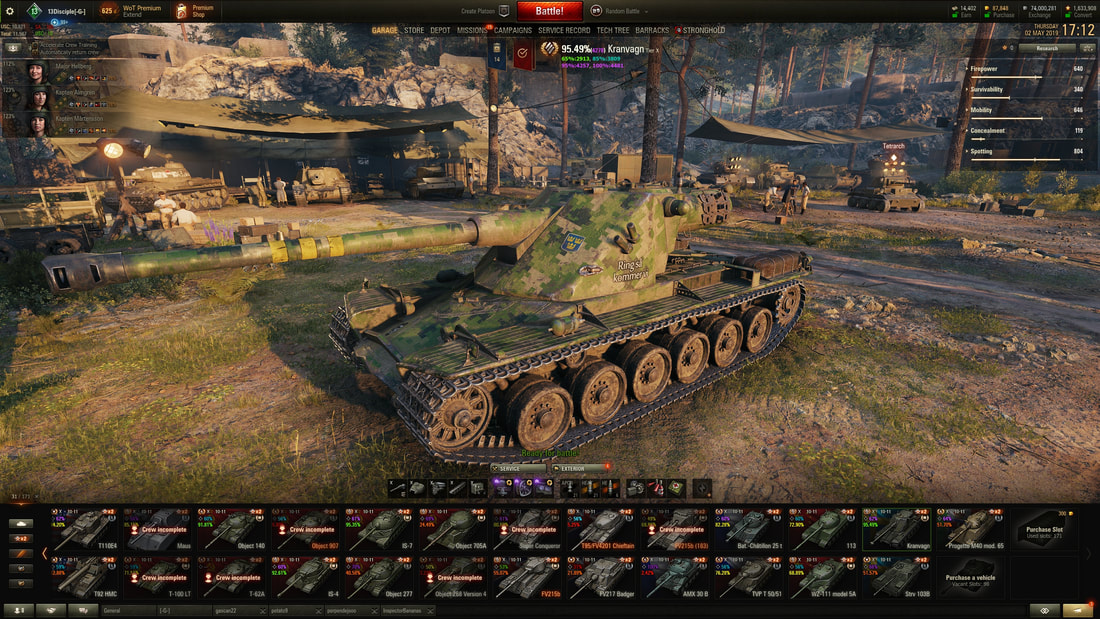
Kranvagn Triple MoE Guide
13Disciple | 2-May-19
Achieved May-2019
Achieved May-2019
The Kranvagn has found a unique place among auto-loading heavies. Let's compare it to its siblings the T-57 and the AMX 50b. The T-57 is a support heavy with the highest DPM of all heavies in the game. It has a modicum of armor which can produce some ricochets but for the most part it's easily penetrated. The AMX 50b is far more mobile and has better accuracy and gun handling when compared to the T-57, but it gives up most of its armor to achieve that. Both have 400 alpha, 4 round clips. In comparison to those characteristics the Kran fits somewhere between a brawler and a support heavy. The higher 440 alpha and smaller 3 shot clip size fits the role of brawler much better. The strong turret armor, and fast clip reload really drives it into that brawler niche. However it still needs at least some support as the vehicle becomes very vulnerable between reloads, and the 1320 clip alpha means you can finish off isolated tanks, but you better be certain they are alone.
NOTE: This guide is my perspective, and is not guaranteed to help you. Other players may disagree with my suggestions and that's OK. If you are having trouble after implementing what I recommended in this guide, I suggest you experiment with load outs, crew skills, and play style to see what works well for you.
Crew Skills
Commander (Radio Operator, Loader): Sixth Sense, Repairs, BiA, Situational Awareness, Recon*, Firefighting
Gunner (Loader): Repairs, Snapshot, BiA, Safe Stowage, Designated Target, Armorer
(Train armorer before safe stowage and designated target and then retrain to safe stowage first and then retrain for designated target after Armorer reaches 100% both times)Driver: Repairs, Smooth Ride, BiA, Off Road Driving, Clutch Braking, Controlled Impact (or alternatively fire fighting)
Driver: Repairs, Smooth Ride, BiA, Off Road Driving, Clutch Braking, Controlled Impact (or alternatively fire fighting)
*Make sure you train Situational Awareness (radio operator) before you train Recon (commander). This is because Situational Awareness at 100% yields a 3% boost to view range, while Recon at 100% only yields 2% boost to view range.
This is an ideal tank to use female (or any 0-skill crew) crew members on.
Equipment
Improved Vents | Improved Verticle Stabalizer | Improved Coated Optics
In my opinion the triple MoE can be achieved with standard equipment.
Ammunition
Ammunition is more of a personal preference. I ran 21 AP | 21 HEAT | 6 HE
I used the HE rounds for the rare instance I came across a lightly armored tank such as the FV4005, or when I needed to secure a cap reset. Really you can run w/e ratio you want - if you find yourself running out of a certain ammo type, don’t be afraid to adjust your load out.
Consumables
Large Repair | Coffee with Cinnamon Buns | Large Medkit | Directive: Firefighting
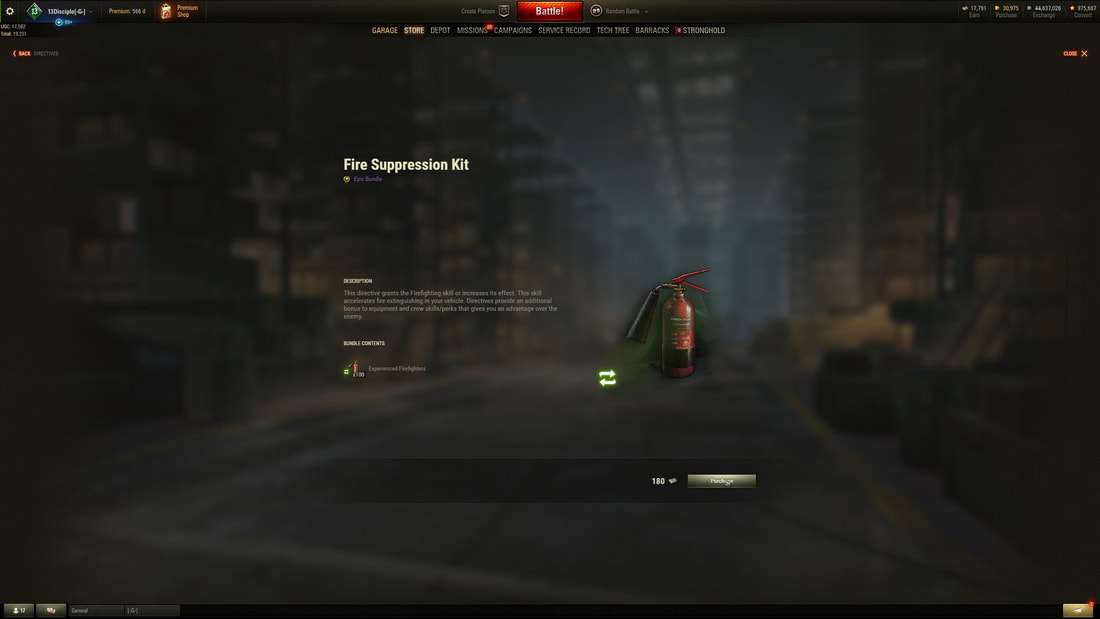
Special note on consumables, I ran an automatic fire extinguisher, along with standard repair and medkits, until I was around 87% MoE. After that I switched to large kits, and food. I also applied the firefighting directive to make up for the lack of fire extinguisher. You can purchase a single directive for 2 bonds or alternatively, and I recommend this, you can buy a bundle of 100 fire fighting directives for 180 bonds - saving you 20 bonds in total.
Firepower
The Kranvagn - despite its recent changes in 1.5, is a bit of a mixed bag when it comes to fire power. The DPM got a very good bump, which for the most part balances out the rather poor gun handling, and the bad HEAT penetration. Does bad penetration cause bouncing your shots, or the gun handling scatter your shots wide? No problem - the higher DPM allows the tank to make up for those lost opportunities. The real trick to this tank is anticipating what your next targets will be, and which ammo gives you the best opportunity to penetrate them. I suggest reviewing my penetration guide regarding the ammo types, but the basics for the Kran are this:
APCR: Use this ammunition if you don’t think the first tanks you will see are heavily armored. This shell is ideal for long range shots, or at fast moving targets. It's also much better for penetrating tracks, because it can penetrate the spaced armor (tracks) on the sides of tanks.
HEAT: Use this ammunition if you are going up against well armored tanks. The abysmal 300mm penetration is difficult as the HEAT round has no normalization, so you need to ensure you hit the thinnest, flattest plates available to you. The low penetration also means this round is unlikely to reliably penetrate spaced armor and the tank hulls you fire at. This is also ideal for shooting long range shots at targets that are not moving, as HEAT does not lose penetration potential over distance.
HE: Use this ammunition if you are going to be coming upon a tank with very little armor AND has over 1320HP. You can also use this ammunition to get urgent cap resets.
Overall the gun is serviceable, but really benefits from a well trained crew, and premium food consumables. Don’t be afraid to reload after only 1 or 2 shots. The reload is under 20 seconds - which is far more forgiving when you time it poorly. The quick clip reload also allows you to switch between ammunition types with relative ease.
Mobility
One of the best benefits of the Kranvagn is its decent mobility. The 60kph top forward speed means you can get this tank really moving and you’ll be one of the first to arrive in brawling areas generally allowing you to get a full clip into tanks that are still approaching. It's also going to allow you to relocate relatively quickly to support a flank that is wavering or fall back from a point that is suffering quickly from an overmatch. The decent reverse speed also means you can back off from a ridgeline relatively quickly, which helps minimize your exposure. The power to weight ratio is ok - not great. The soft stats on the terrain resistance are not good. That means that the Kran will have a slower time climbing hills, mostly matching the speed of fast heavies. However the Kran will accelerate downhill much faster and maintain its top speed when bailing off hills. Decent traverse speed combined with clutch braking also means that the Kran is reasonably good at making up for the turret’s very poor traverse speed.
Survivability
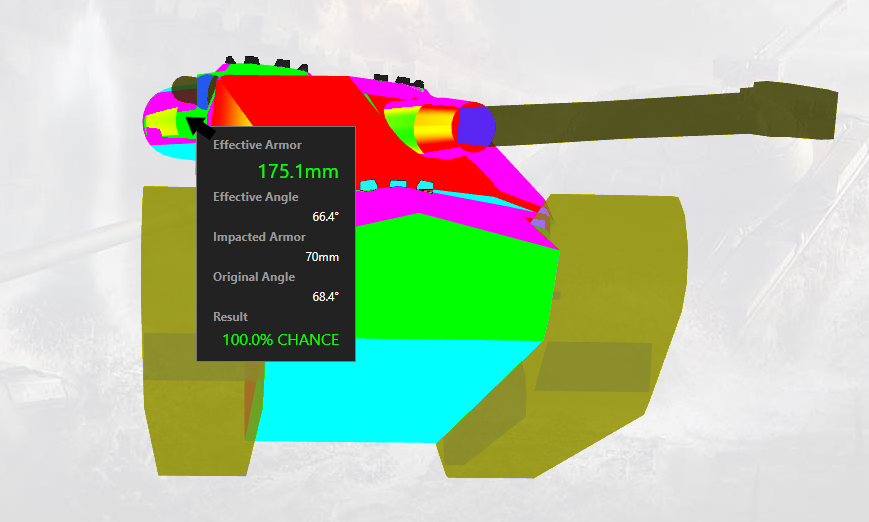
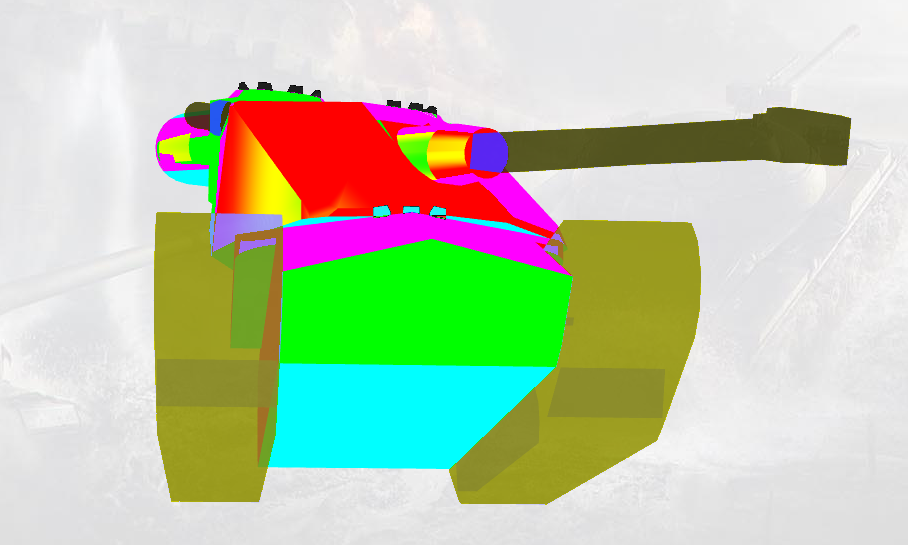
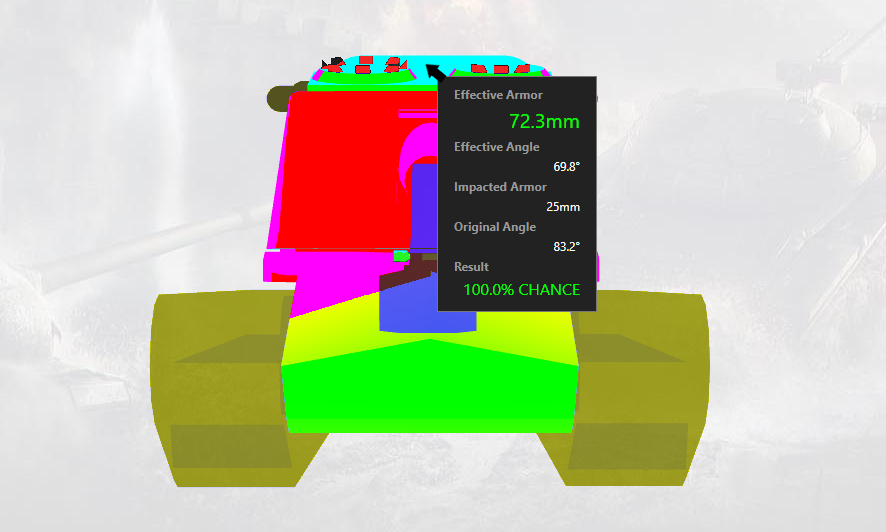
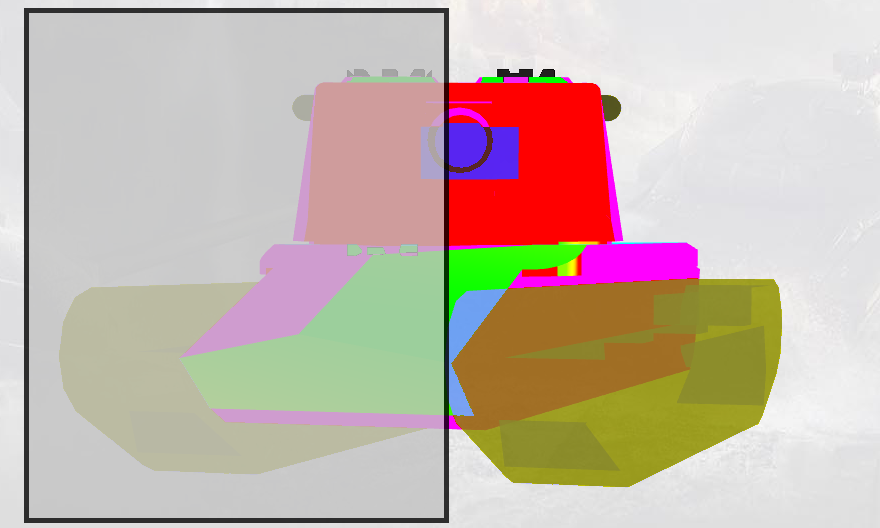
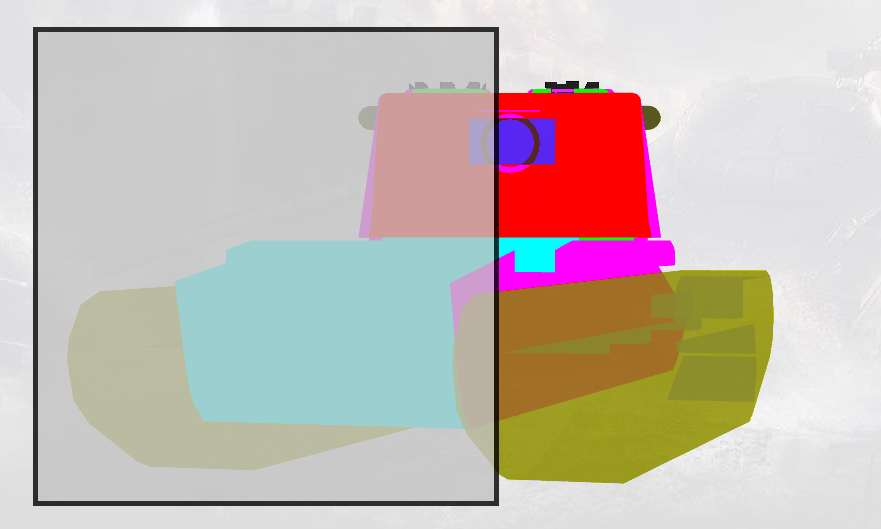
The Kranvagn is best known for its nearly impenetrable turret. It is possible to penetrate the cupolas on the top of the tank however they are recessed. If the tank is using any of its impressive 12 degrees of gun depression, they are nearly impossible to hit. The most vulnerable parts of the turret are the sides. If you are unable to keep all of your enemies directly in front of your turret, then expect to be penetrated by a very slight angle (see images below).
Despite all of that the Kranvagn turret is generally very reliable for bouncing damage, and you should feel relatively safe exposing your turret to brawl out some good damage. Something I learned the hard way. Many times when you begin clipping and reversing from a ridge line, the habit of good players is to zoom out and observe how the game is setting up, and assessing your options. Doing this can makes your gun aim down OR turn the turret! If you aren’t careful you’ll tip the back of your articulating turret above your frontal armor giving the enemy an easy shot. My recommendation is when you are backing up aim up and hold right click to keep your gun pointed up while you zoom out to observe the enemy positions and the mini map.
Sitting at 2000 HP makes the Kran the lowest in terms of hit points on any tier 10 heavy tank. This makes it incredibly important to trade wisely and horde your hitpoints. The Kran is especially vulnerable when facing HE tanks such as Type 5/4s, or high caliber TD’s shooting HE rounds. Playing in a match with lots of artillery means you won’t survive long even when you can angle your armor well. Most tier 9 and 10 artillery will shave off between 400-500 hit points with every direct hit. That will completely destroy you in 4 to 5 hits. It's important to keep moving - don’t feel pressured that you need to drop all 3 shells before moving. Sitting on a ridge dropping your clip takes over 4 seconds. Plenty of time to receive an SPG stun before you get to your 3rd shell.
If you end up on a map that doesn’t provide a decent ridgeline for your tank to use, there is one more trick the Kran is capable of, but many people never try to do. It isn’t perfect at it, but the Kran is capable of both Side Scraping and Reverse Sidescraping! I generally only recommend you give this a try on longer distance engagement such as the city area on Fisherman’s bay (especially if the map features 2 or more artillery). Yes, there are vulnerable parts, but at distance its very hard for a tank to hit them reliably. Most shots will be absorbed by tracks, or bounced off your turret. It takes a very long time to deploy the reverse side scrape because the turret rotation is very slow. For this reason I lean toward regular side scraping.
If you end up on a map that doesn’t provide a decent ridgeline for your tank to use, there is one more trick the Kran is capable of, but many people never try to do. It isn’t perfect at it, but the Kran is capable of both Side Scraping and Reverse Sidescraping! I generally only recommend you give this a try on longer distance engagement such as the city area on Fisherman’s bay (especially if the map features 2 or more artillery). Yes, there are vulnerable parts, but at distance its very hard for a tank to hit them reliably. Most shots will be absorbed by tracks, or bounced off your turret. It takes a very long time to deploy the reverse side scrape because the turret rotation is very slow. For this reason I lean toward regular side scraping.
Images were pulled from tanks.gg
Play Style
Building off of the previous observations, the tank is ideally suited for close to medium range. The reliable turret armor combined with its poor gun handling makes landing damage easier when you are in the face of your enemies brawling or bullying your way to the top of a ridge line. Despite its strong capabilities the clip reload means you CANNOT hold flanks by yourself. You must ensure that you have some form of support. Even if they don’t fire, having at least one single shot tank around will make your enemies hesitate diving on you when they know you are reloading. This means you are also forced to ‘support’ other tanks (even if it is really the other way around). It can be helpful to coordinate with a platoon friend to make sure you always have some form of support brawler with you.
It will take time to master, but you must try to anticipate artillery shells, and either go dark, or keep moving when you feel the eye of the pig is upon you. Try to drive erratically and unpredictably when on reload. NEVER just sit still. Its been said in other articles but I’m going to reiterate it here - when playing against teams with more than 1 arty, keep your distance from your team mates. Strong artillery players will look to stun the most vehicles possible, meaning they will splash in the middle of clustered tanks leaving you high and dry. Good Arty players may focus solely on you in a 3 tier spread match as you are one of the greatest threats on the other team - which again if you are separated that means only you get stunned leaving the remainder of your team in full fighting condition. It's generally a good practice to get into that if you are in a map location vulnerable to artillery you should be placing space between yourself and your teammates - as much as you can without diminishing your ability to engage in the area that you are in.
A key to success in this tank is using as much of your armor as you can. The longer you survive the more damage you can do, and the more spotting you can do. Many times you’ll get free damage at the end of match simply because you’re alive to take it. The strong mobility of the tank accentuates this fact nicely allowing you to race ahead of your slower team mates giving you a valuable extra shot or 2, or extra spotting assist. One last thing to note is that you should be shooting high health tanks. When presented with a full HP tank and a 100 HP tank, wasting a shot to kill a 100hp tank means that for the match you are 300hp less on your MoE. This practice does not help you win matches, or help you with experience. I don’t recommend playing this way unless you are purposefully grinding your MoE. If you want to help your team win games, shoot the lowest HP tanks to remove them from the battlefield quickly.
Make use of your view range! Your friendly arty should be pinging their reload, and their aim. They will let you know when they are ready to shoot at a tank you can spot. Roll out just enough to light them, and soak up all that extra spot damage.
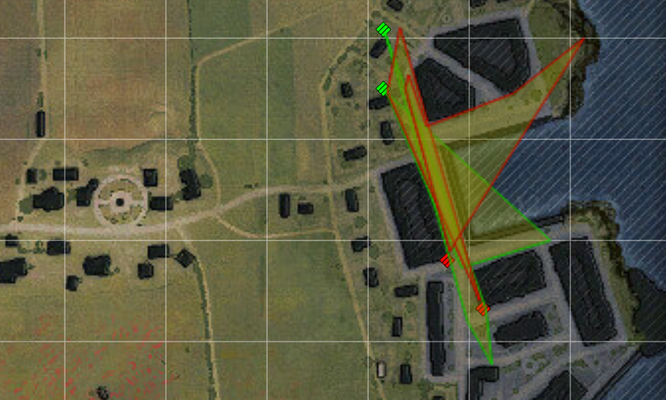
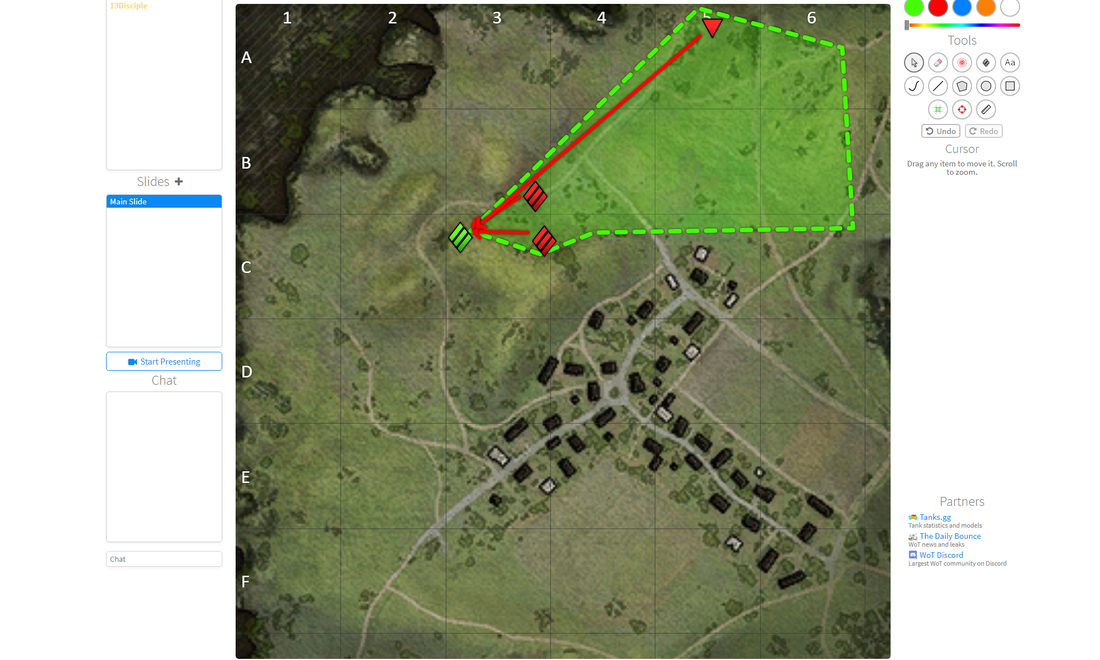
Let's talk about the Kranvagn’s unique style of ridgeline fighting. When given wide ridgelines you must do your best to keep enemy guns in a cone in front of your tank. Recalling the side armor of the turret being rather lowsy, you’ll suffer a lot of extra damage if you don’t give a lot of thought to your micro placement. Let me give an example on Westfield.
In the first image your going to get side shots and lots of good damage here, however you will be exposed to many locations and giving them weak armor. You’ll likely lose hit points poking here for extended period. However in the second image, you’ll be keeping most incoming damage in a cone - the trade off is you’ll likely be shooting the font of enemies. Alternatively not pictured here, you can play on the road itself, or even more towards the 1 line. These aren’t hard fast rules. I have played that first image with great success - but I had to make sure the TD in the back was destroyed first, and that our team had scouted the other spots and made sure they were clear of enemies. It's very situational, but you must approach every ridge keeping in mind that you want to keep incoming fire directed at your cone. Also don’t poke on HE tanks such types and FV’s. Wait for them to fire at something else if you can.
Remember that the further you go up a ridge the more and more exposed your hull is. When peaking a ridge try to engage the first target available. If you poke further to get shots on an alternate target it's likely that the first target you ignored will have hull shots. You’ll get a good feel for this the more experience you have.
Since I’ve pointed out that the Kranvagn is very good at brawling and bullying it should be noted that the Kran should not be played too aggressively. Be conservative and pick your moments of damage carefully in the beginning of matches. As the match progresses you should begin to get more and more aggressive on wins, or fall back on losses.
My last bit of advice is for you to find talented tankers that stream regularly and watch them play. Watching successful players will almost always reveal new map locations, or strategies you might not discover on your own.
|
Suggested Average Combined Damage for 3 Marks of Excellence
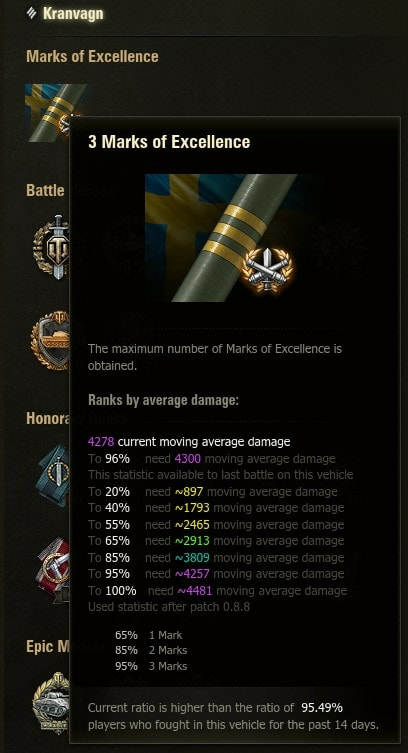
The expected combined damage is climbing since patch 1.5. As of the writing of this article for the NA server, to earn a 3 MoE on the Kranvagn you’ll want to try and average your combined raw damage, and assisted damage to over 4.2K. Games that are between 3.9 and 4.3K will for the most part leave your MoE where it is (only changing up and down by minimal amounts.. Anything less than 3.8K will lower your Mark, and anything above 4.5K will raise it. The higher above 4K the more it’ll raise. Given that the patch for 1.5 (released 2 days prior to this marking session) has buffed this tank, I believe we’ll see this expected MoE get a rather big bump from many skilled players taking the tank out again over the next 2 weeks I expect the MoE to approach 5k combined. I estimate in 6 to 8 weeks the Kran should see its expected MoE come back down a touch and settle around 4.5k combined (+ or - 200 dmg). If that doesn't make any sense to you I suggest you review my article on How MoE Work. |
